
This post was originally published on July 14, 2018
The latest update to this post was made 3 weeks ago.
 Baofeng Handheld Settings
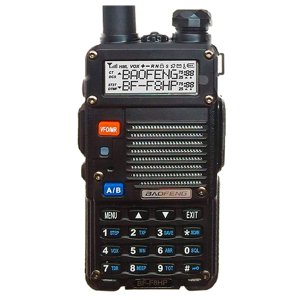
I recently got into ham radio and my starter unit is a Baofeng BF-F8HP. I struggled a little bit with the various settings on this unit, trying to find that ‘perfect setup’. After many days of digging, testing and trying, here are the settings I found to work well for me.
IMPORTANT: FCC rules state that you can own one of these radios and listen as much as you want, but you cannot legally transmit unless you have a HAM radio license (technician, general or extra). You can find more info about getting your FCC license at the [ARRL Website].
| MENU OPTION / NAME | SETTINGS | DESCRIPTION | NOTE(S) |
| 0 – SQL [Squelch Control] | VALUES 0 THRU 9 | Silences the receiver when there is no signal. Setting 0 means no squelch (fully open, static and all). | I found setting ‘2’ to work well. It doesn’t cut too much out and allows slightly weaker signals to still make it in. |
| 1 – STEP [Frequency Step] | 2.5K, 5.0K, 6.25K, 10.0K 12.5K, 20.0K, 25.0K, 50.0K |
Allows selection of the frequency ‘steps’ when scanning or using the up/down arrows to tune a frequency. |
Setting ‘2.5k’ works well for me as I don’t want to miss any conversations that may not be on exact 12.5k markers for example. 2.5 scans slower, but can pick up more conversations in many cases. |
| 2 – TXP [Transmit Power] | HIGH (H) MEDIUM (M) LOW (L) |
This allows you to set the TRANSMIT power of your unit. Some units like the UV-5R may only have low and high. | These settings (on my specific unit) refer to the RF output power when transmitting. 7-8watt (H), 4watt (M) and 1watt (L). You are supposed to use the lowest amount of transmission power possible for your communication, so experiment with what works best for you. I found that (M) works well for me on most repeaters, but if using simplex (H) was better. |
| 3 – SAVE [Power Saver] | OFF, 1, 2, 3, 4 | Selects the ratio of sleep cycles to awake cycles (1:1, 2:1, 3:1. 4:1). | Higher save values will use less battery power, but comes at the cost of possibly missing the first few characters or word of any received communications. I have found that a setting of ‘1’ or ‘2’ works well overall. If you have problems with it still cutting off start of conversation, set to OFF. |
| 4 – VOX [Voice Operated TX] | OFF, 1, 2, 3, 4, 5, 6, 7, 8, 9, 10 | When this is enabled, voice activation can open your mic (preventing the need to depress the PTT button). The various values adjust the sensitivity. | This setting will be unique to your voice and operating environment. OFF disables the feature, 10 is most sensitive. It will start transmitting with any noise it can hear, so not many people use this. |
| 5 – WN [Wide Or Narrow Band] | WIDE, NARROW | Use wide bandwidth (25kHz) or narrow bandwidth (12.5kHz). | I have this setting on ‘NARROW’ but it may vary for your area or based on the reapeater you are listening to. MOST 2m/70cm ham communications are narrow from what I’ve seen. |
| 6 – ABR [Display Illumination] | OFF, 1, 2, 3, 4, 5, 6, 7, 8, 9, 10 | This setting controls how long the backlight stays lit after no actions are taken on the unit. | I like lights, so I have mine set to ’10’, although if it could go higher I’d choose the max. This will obviously lower battery life a slight amount. |
| 7 – TDR [Dual Watch] | OFF, ON | This setting allows you to monitor two bands at the same time. The frequency with the most recent activity will be the focus and played. | This is a neat setting if you monitor two frequencies at the same time. When one goes quiet, the other will kick on if there is activity, otherwise both will be quiet until there is activity (pending squelch is enabled). Note: this setting is not good for constant broadcasts, such as NOAA weather radio as that stream will always ‘be active’. |
| 8 – BEEP [Keypad Beep] | OFF, ON | This setting allows for the audible confirmation of key presses on the front panel. | I have tried this both off and on, my personal preference is ‘ON’. That way I have confirmation that my key press was registered. |
| 9 – TOT [Transmission Timeout] | 15, 30, 45, 60, 75, 90, 105, 120, 135, 150, 165, 180, 195, 210, 225, 240, 255, 270, 285, 300, 315, 330, 345, 360, 375, 390, 405, 420, 435, 450, 465, 480, 495, 510, 525, 540, 555, 570, 585, 600 | This setting provides a ‘safety switch’ to limit your transmission time to the specified value (in seconds). This can be used to prevent excessively long transmissions and prevent interruptions to other users in the event of a stuck PTT button. | I have this value at ’90’. I figure if I can’t get out what I need to say in 90 seconds, then that’s on me! I’ve probably already lost the attention of the listeners. |
| 10 – R-DCS [Receiver DCS] |
OFF, Values listed below in DCS table. NOTE: this RECEIVE value is typically agreed upon by the sender/receiver in simplex or is set by the repeater operator and is specific the repeater you are tuning to. |
This feature auto mutes the speaker in the absence of this specific low level digital signal. | This is a great feature to enable if you want to only hear transmissions containing the selected DCS code. This could be used to filter out all other signals that don’t carry this code for a more private listening experience. If the transmitting station is not outputting this code, then your receiver will be quiet. My value is currently set to ‘OFF’. |
| 11 – R-CTCS [Receiver CTCSS] |
OFF, Values listed below in the CTCSS table. NOTE: this RECEIVE value is typically agreed upon by the sender/receiver in simplex or is set by the repeater operator and is specific the repeater you are tuning to. |
This feature auto mutes the speaker in the absence of this specific and continuous sub-audible signal. | Much like DCS, this is a great feature to enable if you want to only hear transmissions containing the selected CTCSS code. This could be used to filter out all other signals that don’t carry this code for a more private listening experience. If the transmitting station is not outputting this code, then your receiver will be quiet. My value is currently set to ‘OFF’ and only enabled when needed. |
| 12 – T-DCS [Transmitter DCS] |
OFF, Values listed below in DCS table. NOTE: this TRANSMIT value is typically agreed upon by the sender/receiver in simplex or is set by the repeater operator and is specific the repeater you are tuning to. |
This feature transmits the specific low level digital signal to unlock the squelch on a matched receiver. This setting is often used in conjunction with a repeater. | In person to person mode (aka simplex), using this option with option #10 can cut other conversations out, only allowing you to hear the person with the matched DCS code. If transmitting to a repeater, you will need to set this option to the DCS value for the repeater you are attempting to communicate through to ‘wake it up’. |
| 13 – T-CTCSS [Transmitter CTCSS] |
OFF, Values listed below in the CTCSS table. NOTE: this TRANSMIT value is typically agreed upon by the sender/receiver in simplex or is set by the repeater operator and is specific the repeater you are tuning to. |
This feature transmits the specific sub audible signal to unlock the squelch on a matched receiver. This setting is often used in conjunction with a repeater. | In person to person mode (aka simplex), using this option with option #11 can cut other conversations out, only allowing you to hear the person with the matched CTCSS code. If transmitting to a repeater, you will need to set this option to the CTCSS value for the repeater you are attempting to communicate through to ‘wake it up’. |
| 14 – VOICE [Voice Prompts] | OFF, ENG, CHI | This feature allows voice readout of various functions. | The Baofeng’s default to CHI (Chinese) if you factory default the settings, so quickly hop to this menu option to turn off or set to ENG (English). I found that this setting was missed when turned off, so I have it back on ‘ENG’. |
| 15 – ANI-ID [Automatic NumberID] | N/A – Hard coded | This menu option shows your units specific ANI code. This menu cannot change this value. It is used in conjunction with the alarm mode (see option #32 below for more). | This setting is hard coded. See option #32 to below for more information on how this code is used with an alarm call. |
| 16 – DTMFST [DTMF Side Tone] | OFF, DT-ST, ANI-ST, DT+ANI | This setting determines if DTMF side tones can be heard out loud by your receivers speaker. |
This setting is outlined below, I have mine set to the default of ‘DT+ANI’: OFF: No DTMF side tones are heard. |
| 17 – S-CODE [Signal Code] | 1, 2, 3, 4, 5, 6, 7, 8, 9, 10, 11, 12, 13, 14, 15 | Selects 1 to 15 DTMF codes. DTMF codes are programmed with software and are up to 5 digits each. |
I have not used this function, so my radio remains on the factory default of ‘1’. |
| 18 – SC-REV [Scanner Resume] | TO, CO, SE | This setting controls the scanning resume control method. |
This setting is outlined below, I switch between ‘TO’ and ‘CO’ based on the need. Most of time I leave this is ‘CO’ and manually stop scans if I run across something of interest. TO: Timed Operation – scanning resumes after a fixed amount of time has passed, regardless of whether the current frequency has traffic or not. |
| 19 – PTT-ID [Sending Of PTT-ID] | OFF, BOT, EOT, BOTH | This setting controls when to send the PTT-ID if used. Codes are sent at either the beginning of the transmission (BOT) or at the end (EOT) or BOTH. |
The settings below explain a bit more in detail. I currently have this option set to ‘OFF’. BOT: Selected S-CODE is sent at the beginning of a transmission. |
| 20 – PTT-LT [Signal Code Delay] | 0 Thru 50ms | Controls the PTT-ID delay in milliseconds. |
Using this setting can compensate for lost or improperly received PTT-IDs when the receiving unit cannot accept them as fast as you are sending. This could be due to distance delays or interference. Adding a very small delay can help compensate for this interference. Leave this at ‘0’ unless you are specifically having trouble with your PTT-IDs. |
| 21 – MDF-A [Channel A Display] | CH, NAME, FREQ | Selects the way you want the channels displayed on the main screen, whether you want the channel, friendly name of the frequency or the actual frequency displayed. |
The default value of ‘FREQ’ is workable, but when you get a lot of entries, you might find that putting a ‘friendly name’ helps so you don’t have to remember what frequency is what. The friendly names of frequencies cannot be input from the radio itself, but can be entered via software, such as Chirp via the USB cable connection. |
| 22 – MDF-B [Channel B Display] | CH, NAME, FREQ | Selects the way you want the channels displayed on the main screen, whether you want the channel, friendly name of the frequency or the actual frequency displayed. |
The default value of ‘FREQ’ is workable, but when you get a lot of entries, you might find that putting a ‘friendly name’ helps so you don’t have to remember what frequency is what. The friendly names of frequencies cannot be input from the radio itself, but can be entered via software, such as Chirp via the USB cable connection. |
| 23 – BCL [Busy Channel Lockout] | OFF, ON | This option disables the PTT button on a frequency or channel that is already in use. |
This is a great feature to make sure you don’t “key over” a conversation in progress. I currently have this option set to ‘ON’. |
| 24 – AUTOLK [Auto Lock] | OFF, ON | When enabled, this feature will automatically lock the keypad if the unit is not used for more than 8 seconds. Pressing the # key for 2 seconds will unlock. |
This feature is self-explanatory – it is a personal preference. I currently have this feature ‘OFF’. |
| 25 – SFT-D [Frequency Shift] | OFF, -, + | This feature enables or disables frequency shift. Frequency shift is typically used with repeaters, either positive or negative. |
This setting is used with repeaters, for a repeater with an offset of -0.6, you would choose ‘-‘ here. For a repeater with a positive shift, or +0.6, you would choose ‘+’ here. If not using a repeater, turn this feature off. |
| 26 – OFFSET [Frequency Shift] | 000.000 – 069.990 (In 10kHz steps) | This feature sets the frequency shift based on the repeater you are connecting to. This setting is directly related to option #25 above. |
This setting is used with repeaters, for a repeater with a shift of 0.6kHz, you would enter 000.600 here. For a repeater with a shift of 5MHz, you would enter 005.000. |
| 27 – MEM-CH [Channel Memory] | 000 Thru 127 | This menu option allows saving of frequencies to memory for later use or for channel scanning. |
Enter the frequency you wish to save, followed by <MENU> 27. Hit <MENU’> again and enter a memory location, 000 thru 127 and press <MENU> to save the frequency to that ‘slot’. |
| 28 – DEL-CH [Delete Channel] | 000 Thru 127 | This menu option allows for removal of a saved frequency. |
To remove a previously saved frequency, press <MENU> 28. Hit <MENU’> again and enter a memory location to delete, 000 thru 127 and press <MENU> to erase the frequency from that ‘slot’. |
| 29 – WT-LED [Display Color, Default] | OFF, BLUE, ORANGE, PURPLE | This menu option allows you to set the default (standby) backlight color on your display. |
The default option of ‘PURPLE’ is where I left this setting. |
| 30 – RX-LED [Display Color, Receive] | OFF, BLUE, ORANGE, PURPLE | This menu option allows you to set the receive backlight color on your display. |
The default option of ‘BLUE’ is where I left this setting. |
| 31 – TX-LED [Display Color, Transmit] | OFF, BLUE, ORANGE, PURPLE | This menu option allows you to set the transmit backlight color on your display. |
The default option of ‘ORANGE’ is where I left this setting. |
| 32 – AL-MOD [Alarm Mode] | SITE, TONE, CODE | This menu option controls the radio behavior if the orange CALL button is held down to activate the alarm. (Related option #15 above). |
I currently have this setting on ‘SITE’. The options are explained below: SITE: Sounds a local alarm through your radio speakers only. |
| 33 – BAND [Band Selection] | VHF, UHF | in VFO/Frequency mode, this option sets either frequency A or frequency B to VHF or UHF. |
I have this set to the default of ‘VHF’. I am still trying to figure out the difference of this option, as UHF is still received with no trouble, even in VHF mode. |
| 34 – TDR-AB [Transmit Selection] | OFF, A, B | When enabled, priority is returned to selected display once the signal in the other display disappears. |
I currently have this setting ‘OFF’. |
| 35 – STE [Squelch Tail] | OFF, ON | This setting is used to eliminate squelch tail between Baofeng units that are communicating directly (no repeater). |
This setting is currently set ‘OFF’ for me as the squelch tail doesn’t bother me. Turn this setting on to make the squelch tail silent. |
| 36 – RP-STE [Squelch Tail RP] | OFF, Values 1 Thru 10 | This setting is used to eliminate squelch tail on units that are transmitting through a repeater. |
This option achieves the same as option #35 for Baofeng to Baofeng units. The select-able numbers 1 to 10 indicate how much of the squelch tail to cut off in x100 milliseconds. This may vary from repeater to repeater. I typically leave this option ‘OFF’. |
| 37 – RPT-RL [Squelch Tail Delay RP] | OFF, Values 1 Thru 10 | This setting is used to delay the tail tone of a repeater in x100 milliseconds. |
Use this setting to fine-tune option #36. I just left this value to the default of ‘OFF’. |
| 38 – PONMSG [Power On Message] | FULL, MSG | This setting controls the behavior of the display when the unit is powered up. |
See explanation below, I currently have this option set to ‘MSG’ because I have a customized message window appear at boot up. The default of ‘FULL’ shows a screen test. Custom messages must be programmed via software (USB cable). You cannot customize a message from the built-in menus. |
| 39 – ROGER [Roger Beep] | OFF, ON | This setting is used to send an ‘end of transmission’ tone to alert other stations that your transmission has ended. |
This is useful feature to alert the other listening parties that your transmission has ended. During certain events or on certain repeaters, this tone may already be generated, so this would cause a double-beep. This is a personal preference. I currently have this setting ‘OFF’. |
| 40 – RESET | VFO, ALL | This setting factory defaults the radio based on the selection you make. |
VFO: Clears the memory channels out. |
DCS Codes Table (For Options #10 And #12 Above)
| NUMBER | CODE | NUMBER | CODE | NUMBER | CODE | NUMBER | CODE |
| 001 | D023N | 002 | D025N | 003 | D026N | 004 | D031N |
| 005 | D032N | 006 | D036N | 007 | D043N | 008 | D047N |
| 009 | D051N | 010 | D053N | 011 | D054N | 012 | D065N |
| 013 | D071N | 014 | D072N | 015 | D073N | 016 | D074N |
| 017 | D114N | 018 | D115N | 019 | D116N | 020 | D122N |
| 021 | D125N | 022 | D131N | 023 | D132N | 024 | D134N |
| 025 | D143N | 026 | D145N | 027 | D152N | 028 | D155N |
| 029 | D156N | 030 | D162N | 031 | D165N | 032 | D172N |
| 033 | D174N | 034 | D205N | 035 | D212N | 036 | D223N |
| 037 | D225N | 038 | D226N | 039 | D243N | 040 | D244N |
| 041 | D245N | 042 | D246N | 043 | D251N | 044 | D252N |
| 045 | D255N | 046 | D261N | 047 | D263N | 048 | D265N |
| 049 | D266N | 050 | D271N | 051 | D274N | 052 | D306N |
| 053 | D311N | 054 | D315N | 055 | D325N | 056 | D331N |
| 057 | D332N | 058 | D343N | 059 | D346N | 060 | D351N |
| 061 | D356N | 062 | D364N | 063 | D365N | 064 | D371N |
| 065 | D411N | 066 | D412N | 067 | D413N | 068 | D423N |
| 069 | D431N | 070 | D432N | 071 | D445N | 072 | D446N |
| 073 | D452N | 074 | D454N | 075 | D455N | 076 | D462N |
| 077 | D464N | 078 | D465N | 079 | D466N | 080 | D503N |
| 081 | D506N | 082 | D516N | 083 | D523N | 084 | D526N |
| 085 | D532N | 086 | D546N | 087 | D565N | 088 | D606N |
| 089 | D612N | 090 | D624N | 091 | D627N | 092 | D631N |
| 093 | D632N | 094 | D645N | 095 | D654N | 096 | D662N |
| 097 | D664N | 098 | D703N | 099 | D712N | 100 | D723N |
| 101 | D731N | 102 | D732N | 103 | D734N | 104 | D743N |
| 105 | D754N |
CTCSS Codes Table (For Options #11 And #13 Above)
| NUMBER | FREQUENCY | NUMBER | FREQUENCY | NUMBER | FREQUENCY | NUMBER | FREQUENCY |
| 01 | 67.0 | 02 | 69.3 | 03 | 71.9 | 04 | 74.4 |
| 05 | 77.0 | 06 | 79.7 | 07 | 82.5 | 08 | 85.4 |
| 09 | 88.5 | 10 | 91.5 | 11 | 94.8 | 12 | 97.4 |
| 13 | 100.0 | 14 | 103.5 | 15 | 107.2 | 16 | 110.9 |
| 17 | 114.8 | 18 | 118.8 | 19 | 123.0 | 20 | 127.3 |
| 21 | 131.8 | 22 | 136.5 | 23 | 141.3 | 24 | 146.2 |
| 25 | 151.4 | 26 | 156.7 | 27 | 159.8 | 28 | 162.2 |
| 29 | 165.5 | 30 | 167.9 | 31 | 171.3 | 32 | 173.8 |
| 33 | 177.8 | 34 | 179.9 | 35 | 183.5 | 36 | 186.2 |
| 37 | 189.9 | 38 | 192.8 | 39 | 196.6 | 40 | 199.5 |
| 41 | 203.5 | 42 | 206.5 | 43 | 210.7 | 44 | 218.1 |
| 45 | 225.7 | 46 | 229.1 | 47 | 233.6 | 48 | 241.8 |
| 49 | 250.3 | 50 | 254.1 |
Updated: 05-11-2023 with slightly modified settings after two years of use.
Tags: #hamradio #baofeng #setup #configuration #amateurradio
![]()
Be the first to comment